

My Introduction to Mechanical Design: the Thrashing Torso
/
The Trashing Sequence
The Mechanical Thrashing Torso was my first attempt at designing and fabricating a mechanical system for emulating organic movement. As such, it is a good starting point for a discussion about the creation of animatronic figures. The process I went through to create the Thrashing Torso is the same I've used ever since.
The Design Process:
The Mechanical Thrashing Torso could accurately be described as a single axis, cable-actuated tentacle mechanism with spring-assisted gravity return and a high-torque electric motor with a crank. That description is accurate but unnecessary. At the time I made the Thrashing Torso I was not familiar with most of these terms. However, I was familiar with the things like levers, pulleys, and springs, thanks to a childhood spent disassembling my toys and bicycles. This experience, plus a rudimentary knowledge of tool use and fabrication techniques, was enough for me to figure things out.
The design process for an animatronics figure can be broken down into four basic steps:
-Establish Form
-Determine Movement
-Decide How
-Make A Plan
The Form:
Form follows function is a basic rule of design. However in animatronics this axiom usually gets reversed. Typically, you are given a form and from it you figure out the functions. Whenever I've been called upon to create an animatronic figure the form has usually been decided upon and is presented to me as a sculpture or other type of concept art. This usually works out but it is important to keep in mind some fundamental rules of physics. For example, long spindly legs or giant wings may look great from an aesthetic standpoint but they are mechanically difficult to move. Leverage and mass dictate what moves and how. An octopus can’t gallop and giant flying dragons don't fill the sky. If there is not a good example of what you want to do in nature then it probably can't be done. Stick with what already works and function will follow form.
The Movement:
Once you have a thing you must decide what the thing is going to do. What do you want to move, how far, and how fast? The success of an animatronic project is largely a matter of movement quality. Quality movement is the movement that best pleases the eye and meets or exceeds the expectations of the viewer.
We are all creatures who have evolved surrounded by other creatures. We are all hardwired to respond to those other creatures in very fundamental ways. So everybody is an expert on how living things should move and behave. The animatronic creature needs to play upon that fundamental programming we all share. Is it familiar, is it new, threatening, or friendly? Reference photos and videos are invaluable in determining appropriate movement. Real life examples are even better.
Range of movement, speed of movement, and control of the movement are all determined by basic mechanical and biomechanical principles. You don't need to study engineering to learn how to use them but there are some basic laws of physics that can not be ignored.
The How:
In animatronics there are some tried-and-true techniques for achieving a desired performance. Cable control, servos, and direct physical manipulation (a.k.a. puppeteering) are all common means of moving animatronic figures. We will explore a wide range of techniques when discussing specific projects in future posts.
The Plan:
This may be as simple as where to start and how to end. Parts and materials need to be sourced and obtained. Then everyone involved in the project needs to be coordinated with in order to keep everyone on the same page. A simple project = a simple plan. A complex project with no plan = problems.
Mechanical Thrashing Torso: the Basic Concept

The mechanical thrashing torso was created to be part of a haunted house attraction for halloween. As such it needed to have three primary characteristics:
-Be relatively simple
-Be low maintenance
-Have big, scary movements
The initial idea was to have a limbless human torso wrapped in plastic trash bags lie motionless until an unsuspecting victim passed by, at which time it would begin thrashing around. The garbage bag idea was discarded once it became apparent just how cool the mechanics looked by themselves. Perhaps the amputee in a trash bag was the scarier concept but I decided to feature my handiwork instead.
The Thrashing Torso Form:
I used myself as the model for the Thrashing Torso. Measurements of my own anatomy determined the size and proportions..
The Thrashing Torso’s Function:
All that was required was to approximate the motions of a spasmodically thrashing human torso. One big cyclically repeating motion operated by a single electric motor. Simplicity is always best.
The How of Making the Thrashing Torso:
I am a visual thinker so I always start with a drawing. For the Mechanical Thrashing Torso I created a drawing of a human torso in two positions: fully erect and fully slumped. This served as a graphic representation of where the movement begins and ends. The spinal column was divided up into jointed segments that approximated the articulation of a human backbone.
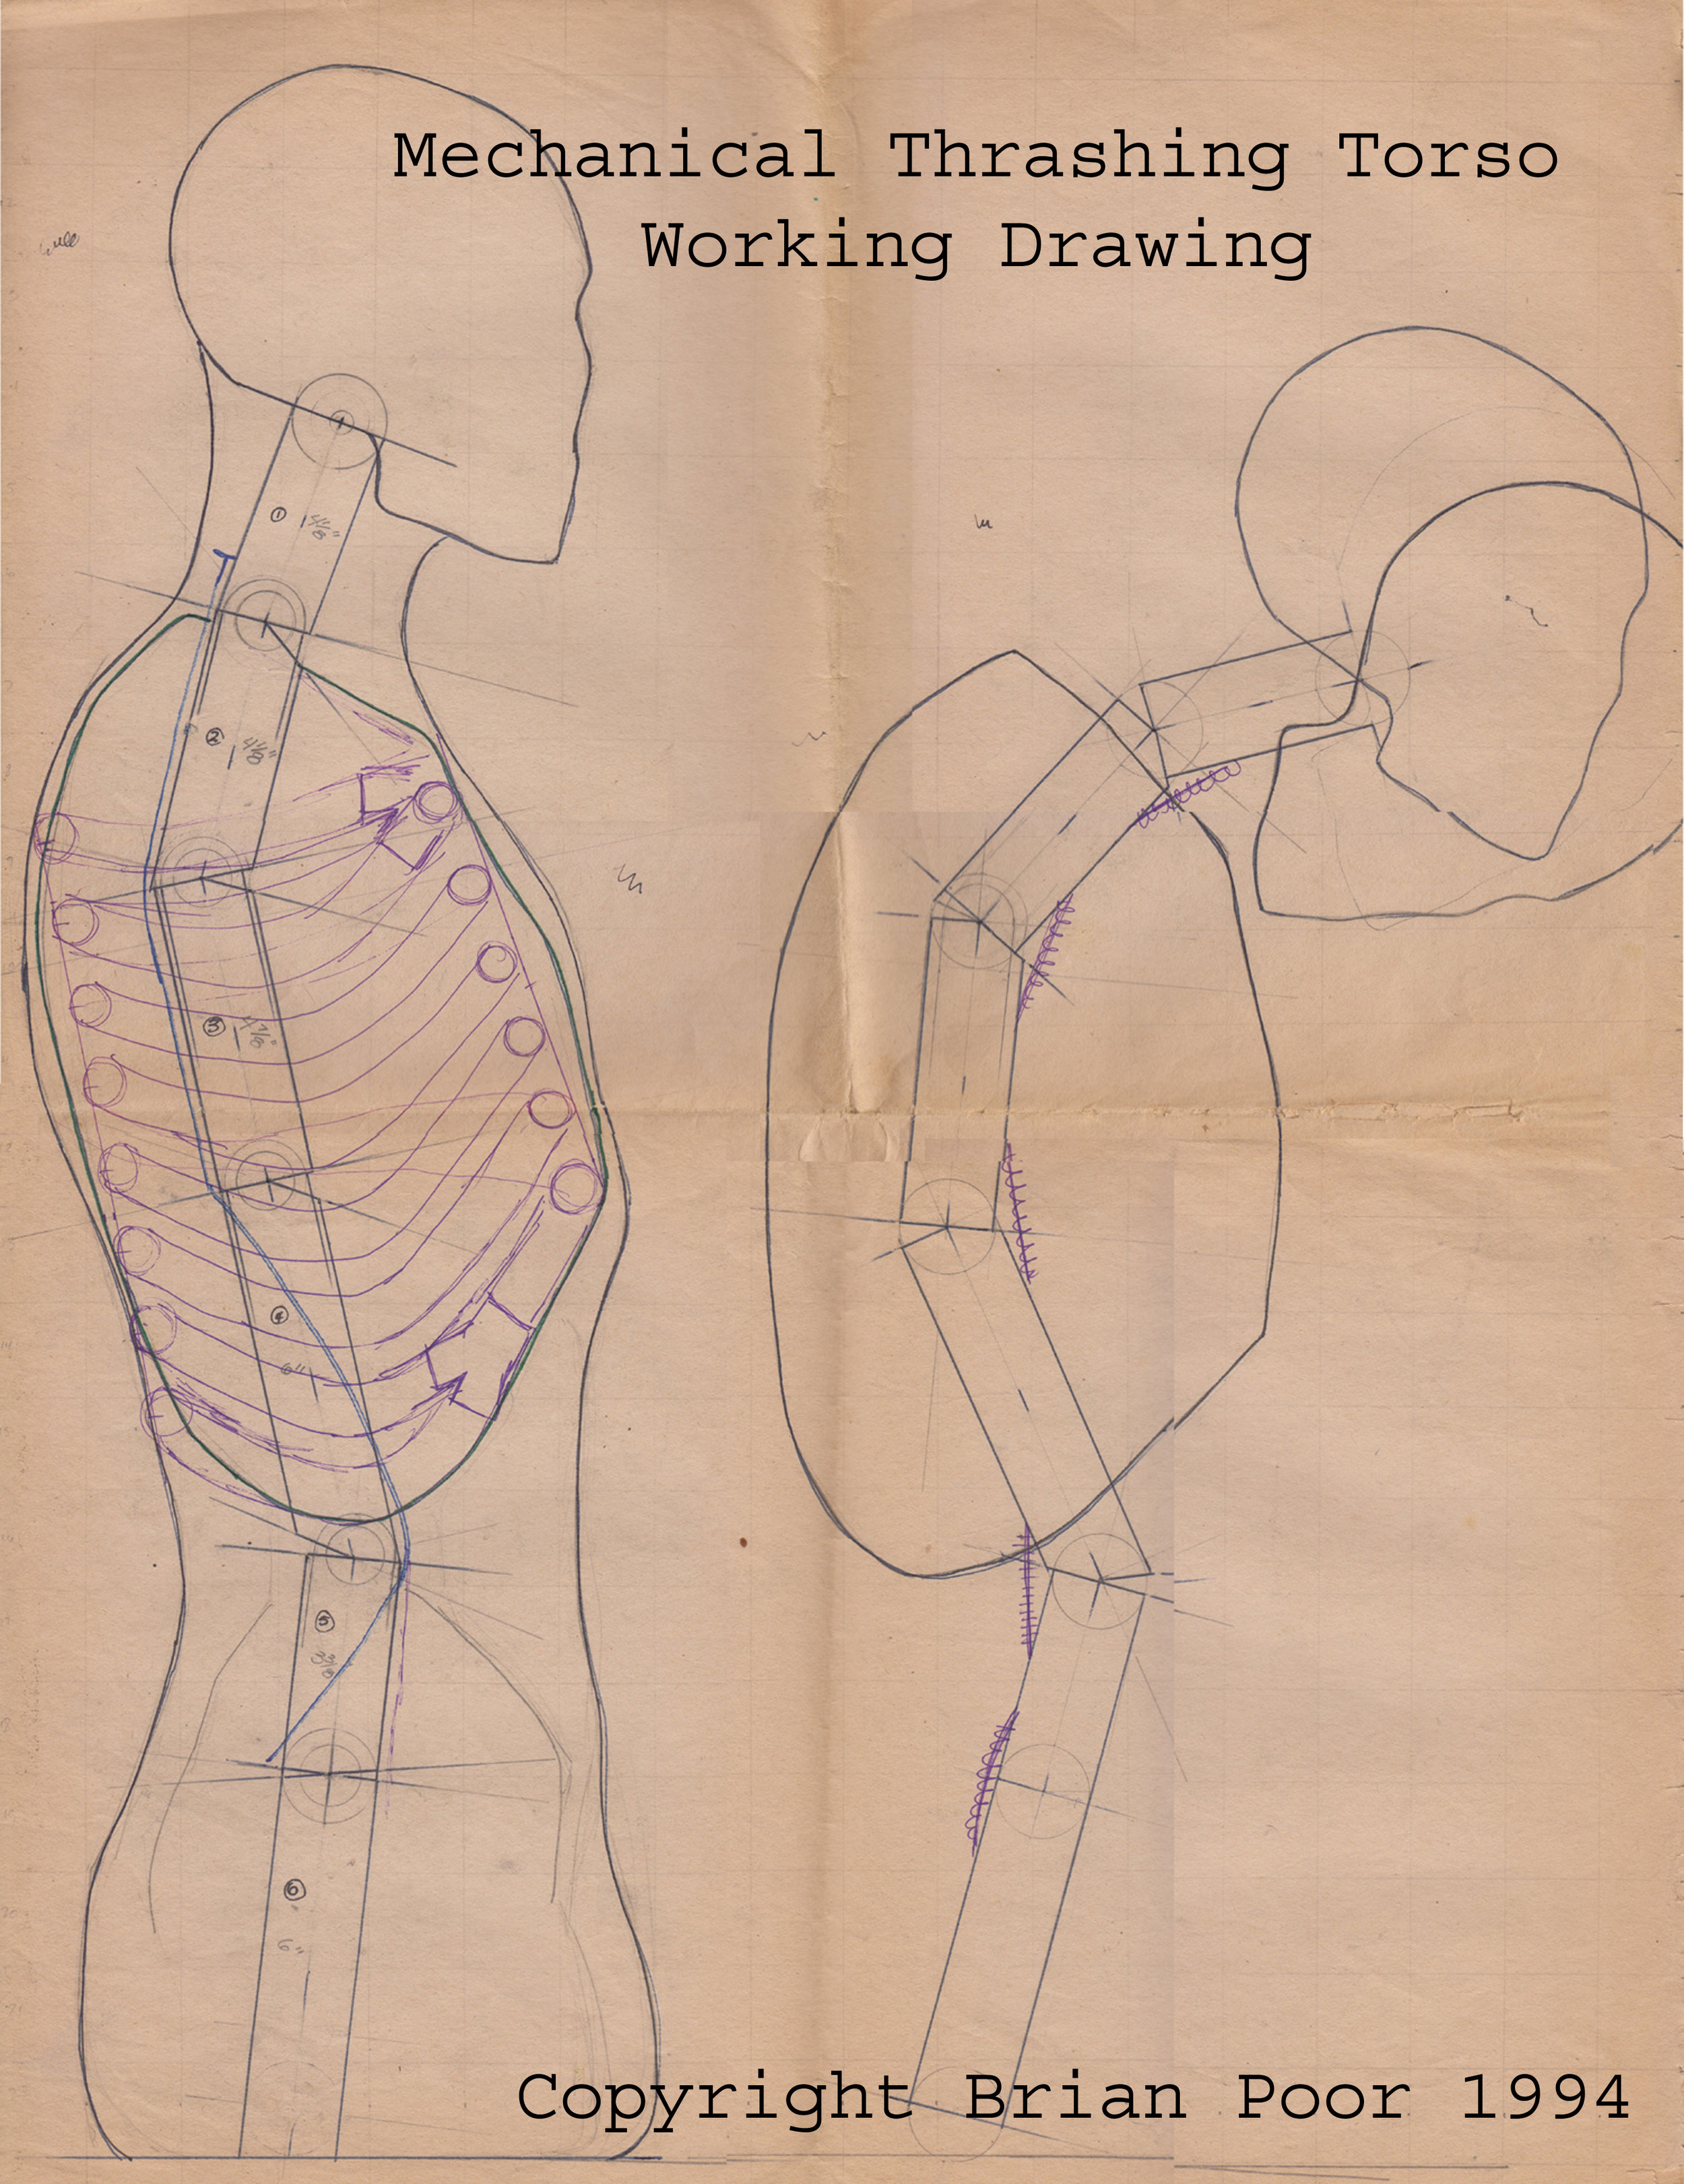
The original working drawing used in the construction of the Mechanical Thrashing Torso
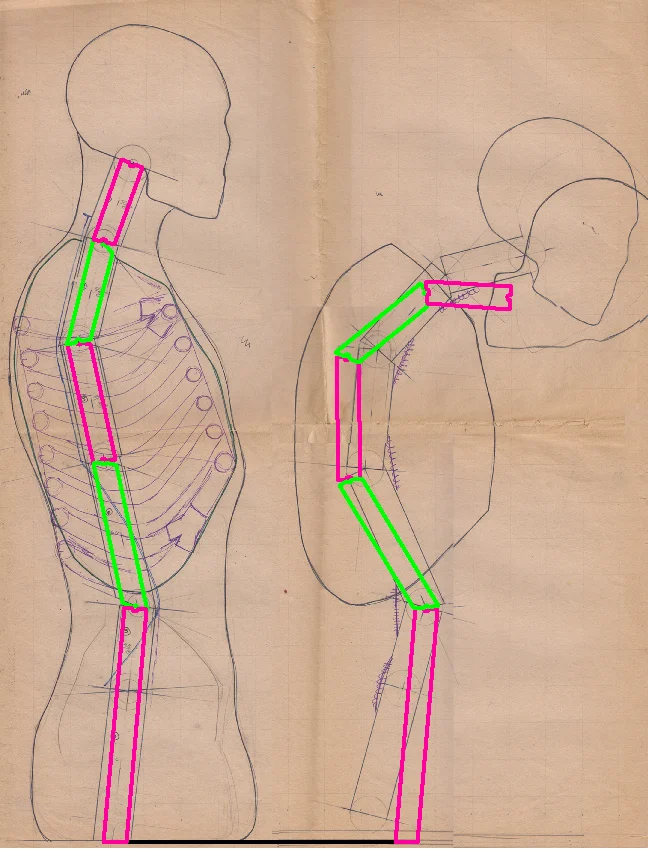
The geometry of the spinal segments in the upright and slumped positions
In order to control the motion of the spinal column each joint needs a mechanical stop, limiting how far each joint can pivot. The physical stops in each joint define the configuration of the spinal column at the erect and slumped positions.
The movement of the spine is limited to a single plane (or axis) and each joint is limited in its range of movement. This allows the mechanical thrashing torso to move in a controlled way. Any more axes of movement and the thing will flop around like a rag doll.
Once the spinal column is assembled and the full range of movement is established, the length of the driver cable can be determined. Cable travel is the length of the pull required to move the spinal column through its full range of movement. Once the travel of the cable is known the length of the crank arm on the drive motor can be determined. The placement of the motor in relation to the torso should also be determined at this point.
When I build an animatronic figure, I find it is helpful to design only up to a certain point and then start building. If I try to design everything out completely, and then start building, all too often much of my design has to be reworked as the build proceeds. That is wasted effort. In the case of the Mechanical Thrashing Torso, I designed and built the spinal column, and then figured out how the cable and motor would work to the best effect.
The Thrashing Torso Plan:
Not much to it. I had very little in terms of a budget, so for materials I scrounged up what I could and bought what I had to. The first thing to build was the segmented spine, followed by the base, the cable/motor drive system, and then the head. My plans always tend to be somewhat vague and consist of broad conceptual strokes. This because unforeseen issues always arrse and sometimes one must zig when when the original idea was to zag.