

WWoT (Part 2) How To Make a Tentacle Mechanism (Old School)
/The 2-Stage Tentacle Mechanism
I am going to show to you how to make a 2-Stage Tentacle Mechanism. This design is largely based upon the tentacles I learned to make while working on the film Species 2. A large number of tentacle mechs where required on that job, so a standard, easily replicable approach was developed to facilitate the manufacturing of many multiples of parts. In this project I am going to outline for you, cast urethane components are used extensively. Some machining is required because sometimes metal parts are the only way to go, but we will keep it to a minimum. The process I am going to describe involves technology that is decades old. 3d printing definitely has a role to play in the creation of tentacle mechanisms, but for our purposes here, I am mostly going to show you how to do it old-school (mostly).
Initially, I intended to post this information on the website www.Instructables.com . I didn't really have a good grasp the scope of this particular undertaking, and more I got into the creation of a step by step set of instructions for the creation of a tentacle mechanism, the more I realized this went way beyond a simple how-to article. I am retaining the format of an Instructables article, but it is going to end up being more like a book. Happy reading!
The Case For Molding and Casting vs. 3d Printing
When many multiples of the same part are needed, molding and casting are tried and true techniques for generating those parts. Tentacle mechs are mostly made up of a long series of discs, so molds will be used in this demonstration to produce the discs.
Pattern Fabrication
However, before a mold can be made, one must have an object to mold. These objects are called patterns. The original tentacle disc patterns molded for use in the Species 2 movie were made using a lathe and a milling machine with a rotary table. Currently, 3d printing presents an alternative to machining the disc patterns. If the technology of 3d printing had been available 20+ years ago that would have been the way to go for generating those initial disc patterns for molding. That being the case, couldn’t all the discs needed for the movie have been made using 3d printers, rather than going through the molding and casting process? The answer is yes, but hundreds (if not thousands) of parts were required for that project and it still would have made sense to mold and cast all those parts because casting is faster than 3d printing when you scale up to hundreds (or thousands) of parts. However, 3d printing would have been much faster than machining to fabricate that initial run of patterns.
So, if you need a single tentacle, 3d print those parts. If you need a dozen tentacles, molding and casting is the way to go, but 3d printing is the most efficient way of creating the patterns to be molded. In any case, some patterns will be need to be generated, whether they are printed or machined. To this end, I have uploaded a complete 3d model of the 2-Stage Tentacle Mechanism to Grabcad.
https://grabcad.com/library/animatronic-2-stage-tentacle-mech-1
For the purpose of this mold making demonstration, I already have parts ready to be molded. Years ago, after all the tentacles were made for Species 2, there were plenty of leftover parts. So I took a selection of discs home and made my own molds for future use. I will now show you how I made those molds.

Making a Simple Box Mold
Materials Needed:
Mold Silicone

Silicone From Reynolds Advanced Materials
First and foremost, to make a silicone mold, one requires silicone. Specifically, mold making silicone. Makes sense, right?
Yeah, well. Looking over my little stache of mold making supplies I realized that I didn’t have any mold making silicone, but I did have some silicone that I had bought a while back for the purpose of experimenting with skins. The shelf life of this particular silicone was about to expire, so what the hell, while I try to teach others to do something the right way I might learn something new (by possibly doing it wrong). Looking at the package of this sample-sized silicone kit, it sure seemed like it could work. So, like I said, what the hell.
It turns out, it does work to use skin silicone to make molds. Maybe not as good as mold making silicone... but beggars can’t be choosers. Nor can people who don’t want to go get the right kind of silicone (ahem).
This is what I used (this time): www.reynoldsam.com/product/ecoflex/
This is what I’ve always used before (and recommend): http://www.silpak.com/pdfs/ECONOSIL25PDS.pdf
Mold Release

Spray On Mold Release From Reynolds Advanced Materials
Mold release makes the life of the mold maker easier. Ask any of them. When I bought that skin silicone sample kit I had also bought a can of spray mold release. The skin silicone I am using is platinum-based so it can be a little sensitive to the chemicals it comes in contact with, unlike the tin-based silicones typically used for making molds. A possible recipe for disaster? Possibly but screw it. Live dangerously. And I really didn’t feel like driving into Burbank to get the correct stuff. Does that make me lazy? Probably. www.reynoldsam.com/product/ease-release-200/
Casting Urethane

Quickcast Urethane Casting Resin From Silpak
I did have the correct casting urethane. The bottles were really dusty and crusty, and this stuff must have a shelf life too, but it still works. This what I used: http://www.silpak.com/pdfs/QUICKCAST.pdf
Isopropyl Alcohol

Isopropyl Alcohol From the Local Drug Store
Cleanliness counts, and for cleaning up goopy residues isopropyl alcohol works great. It also works amazingly well for removing hot glue.
Tools of the Mold Maker’s Trade:
So here is a run down of the various tools and implements I used to make my box mold:
Hot glue gun
Scale (digital or triple beam)
Measuring cup
Plastic container (walls for the box mold)
A pane of glass (a surface to make the box mold on)
Paper towels
Paper cups (waxed)
Mixing sticks
A blob of clay (water based clay prefered, softer than oil-based)
X-acto knife
Small flashlight
Small sturdy knife
Small sharp scissors (cuticle scissors)
Small pokey thing (like a piece of wire or a tiny screwdriver)
Razor blade
Fat felt-tipped pen pen
Needle nose pliers

Useful Stuff

More Useful Stuff

Scale
Making the Box of the Box Mold
Step 1: Select and Modify the Plastic Container

OMG This Is Good Ice Cream
The first thing to do when making a box mold is to make the box. A plastic container of a suitable size is what I will use for this demonstration. The container needs to be big enough to allow all the tentacle discs to be arranged inside and still have at least a quarter of an inch of space between all the parts. The plastic container will serve as the walls of the box mold while the pane of glass will serve as the bottom of the mold. The bottom of the plastic container needs to be carefully cut off with an exacto knife.

Marking The Cut Line

Cutting the Mark Line

Made the Cut
Step 2: Secure the Discs to the Glass
Once the plastic container has been modified, arrange it upside down on the glass surface so that it’s previously removed bottom faces up. Then trace around the perimeter of the plastic container on the glass with a felt-tip marker. This is the space in which the discs will be molded. The discs should be arranged so that no two discs are closer than about a quarter of an inch. Then fire up the glue gun and secure each disc to the glass with a small blob of hot glue. It does not require more than a small amount of hot glue to secure the discs so don’t go crazy with it. It does need to come apart later.

Tracing the Space

Traced Space

Laying Out the Patterns

Hot Gluing the Disc Patterns to the Glass Work Surface
Step 3: Secure the Plastic Container to the Glass
After all the discs have been glued to the glass it is time to glue down the edges of the plastic container. Place it within your traced boundary and run a bead of hot glue all the way around it so that there will be no leaks. It is important that there are no leaks because the silicone for the mold will be poured into this cavity. You really don't want the silicone leaking out; this qualifies as a minor disaster. Once the hot glue has set up give everything a quick spritz with the mold release. Then it is time to mix up the silicone.

Hot Glue is Your Friend

Hopefully There Are No leaks

Spray With Mold release Before Moving On
Measure, Mix, and Pour the Silicone

Fun With Silicone
Step 4: Pour Equal Amounts of Parts A and B Into Mixing Cups
The silicone comes in two parts: part A and part B. You will need to estimate how much silicone is needed to cover the discs with at least a quarter inch of silicone mold material. Estimating the amount of silicone needed is one of those things that is easier to do once you have done it a few times. So for now, overestimate the amount you will need. Too much silicone is better than not enough. Pour equal amounts of part A and part B in two separate mixing cups. The amount you pour should be enough so that when the two parts are mixed together and are poured into the mold they cover the discs to the desired depth.
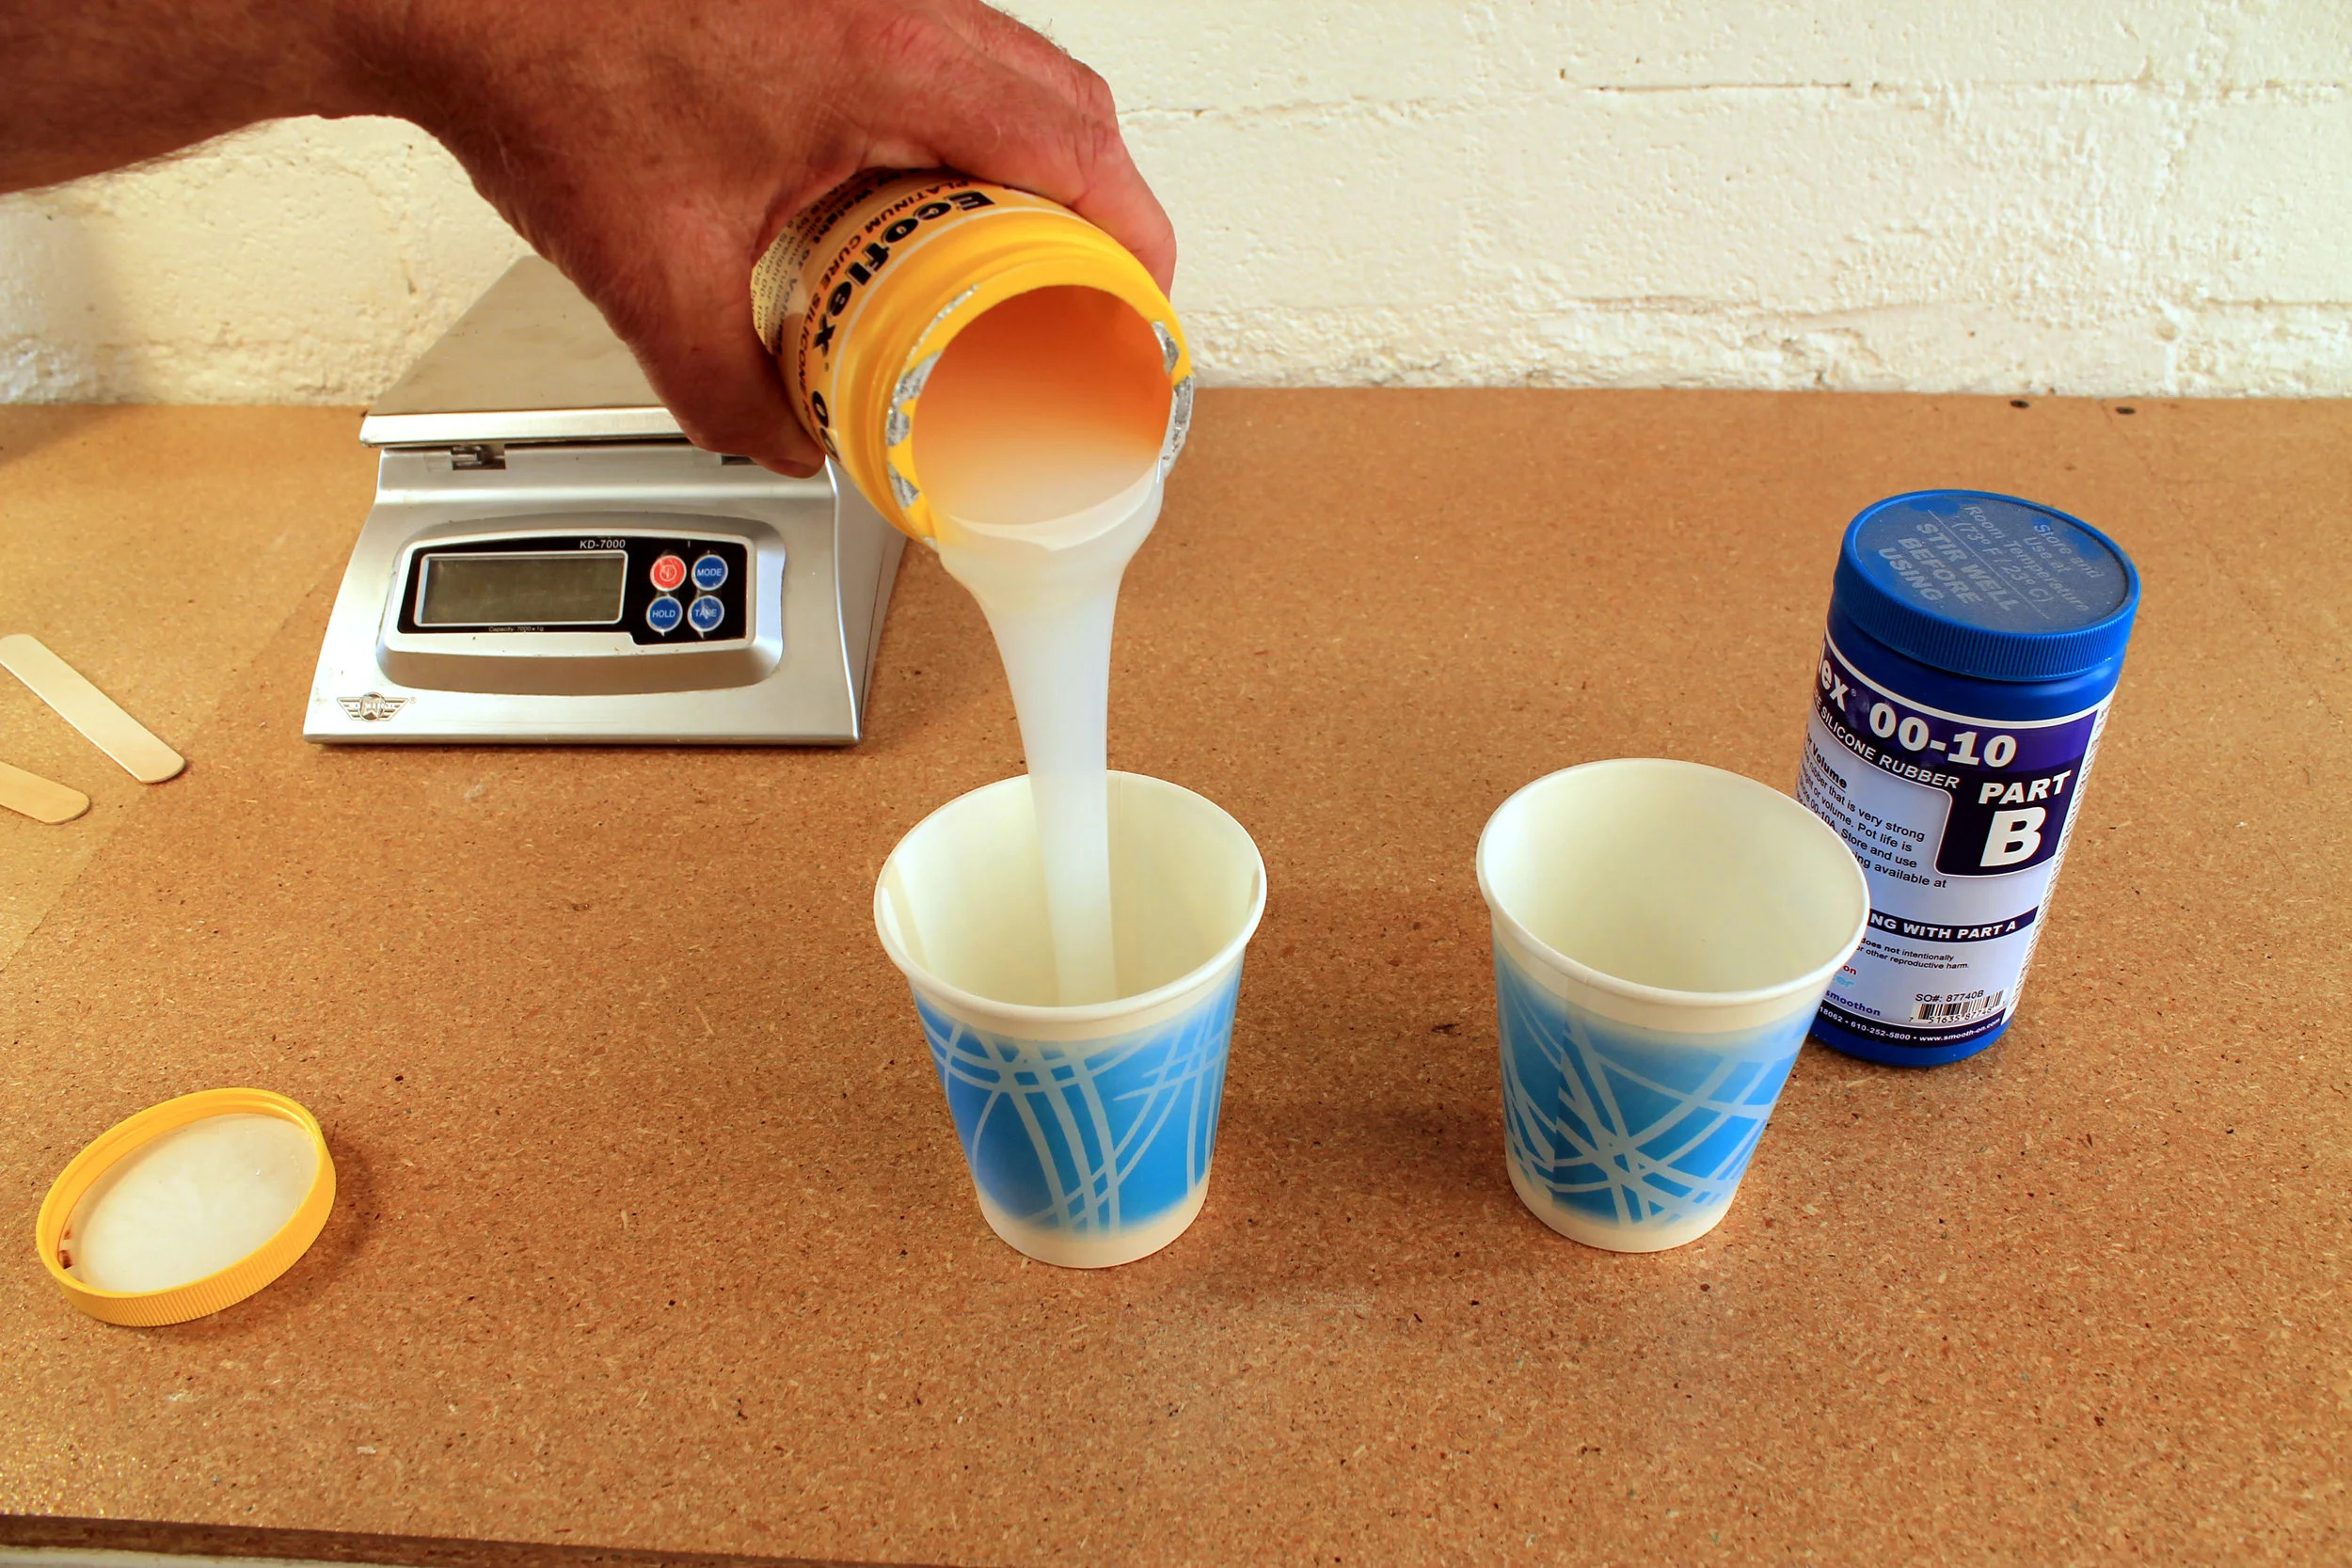
Pouring the Part A

Weighing Part A (101 Grams)

Pouring Part B

Weighing Out the Part B
Step 6: Mix Silicone Parts A and B Together
Once you're satisfied that you have equal amounts of part A and part B in the cups, pour them together into the same cup and mix them up thoroughly with a stirring stick. Make sure the silicone is thoroughly mixed, including the material in the bottom corners of the cup. We don't want any uncured silicone in our mold.

Equal Parts of A and B

Pouring the Parts Together

Mixing....
Step 7: Pour the Silicone
After the silicone is thoroughly mixed it is time to pour it into the mold. In case there is leakage around the bottom edge of the mold it is a good idea to have a blob of clay standing by that can be used to plug the offending hole. Water based clay works better than oil based clay (like plasticine) because it is softer. Silicone seeping through the cracks will get messy real fast so having a piece of clay to slap over the hole can save the day. Hopefully there are no holes. There really isn’t any other effective means of plugging a hole with silicone seeping through it. More hot glue won’t work and neither will tape because uncured silicone is a slimy mess once it escapes from where it is supposed be.
The only trick to pouring the silicone into the mold is to do it slowly so as to minimize any air bubbles captured in the nooks and crannies of the disc patterns being molded. Take it slow. There is no hurry. The silicone will remain runny for a fair amount of time. However, the holes in the disks are small enough that it's pretty much guaranteed there will be air bubbles trapped inside.

Trying to Aim the Silicone Into the Little Holes to Drive Out the Air Bubbles

Blob of Emergency Hole-Plugging Clay (Just In Case)
Step 8: Get the Bubbles Out (Some, Anyway)
The air bubble situation can be mitigated, somewhat, by using a narrow piece of wire to break the air bubbles loose. I used a little jeweler's screwdriver but even a paperclip would serve the purpose. Just poke the “poker” down into the little holes of the discs and stir the silicone up a bit. Some air bubbles are unavoidable, but the less bubbles we have at this point of the process the less cleanup the cast discs will need later on.
There are more effective ways of eliminating bubbles in the silicone involving subjecting the mold to a vacuum to suck the air out, but that is a little beyond what I am presenting here. Some bubbles ain’t gonna kill us. Infact, my little “stirring the bubbles out” technique may be utter hogwash, but that’s how I roll.

My "Bubble Poker"

Bubble Poking (For What It Is Worth)
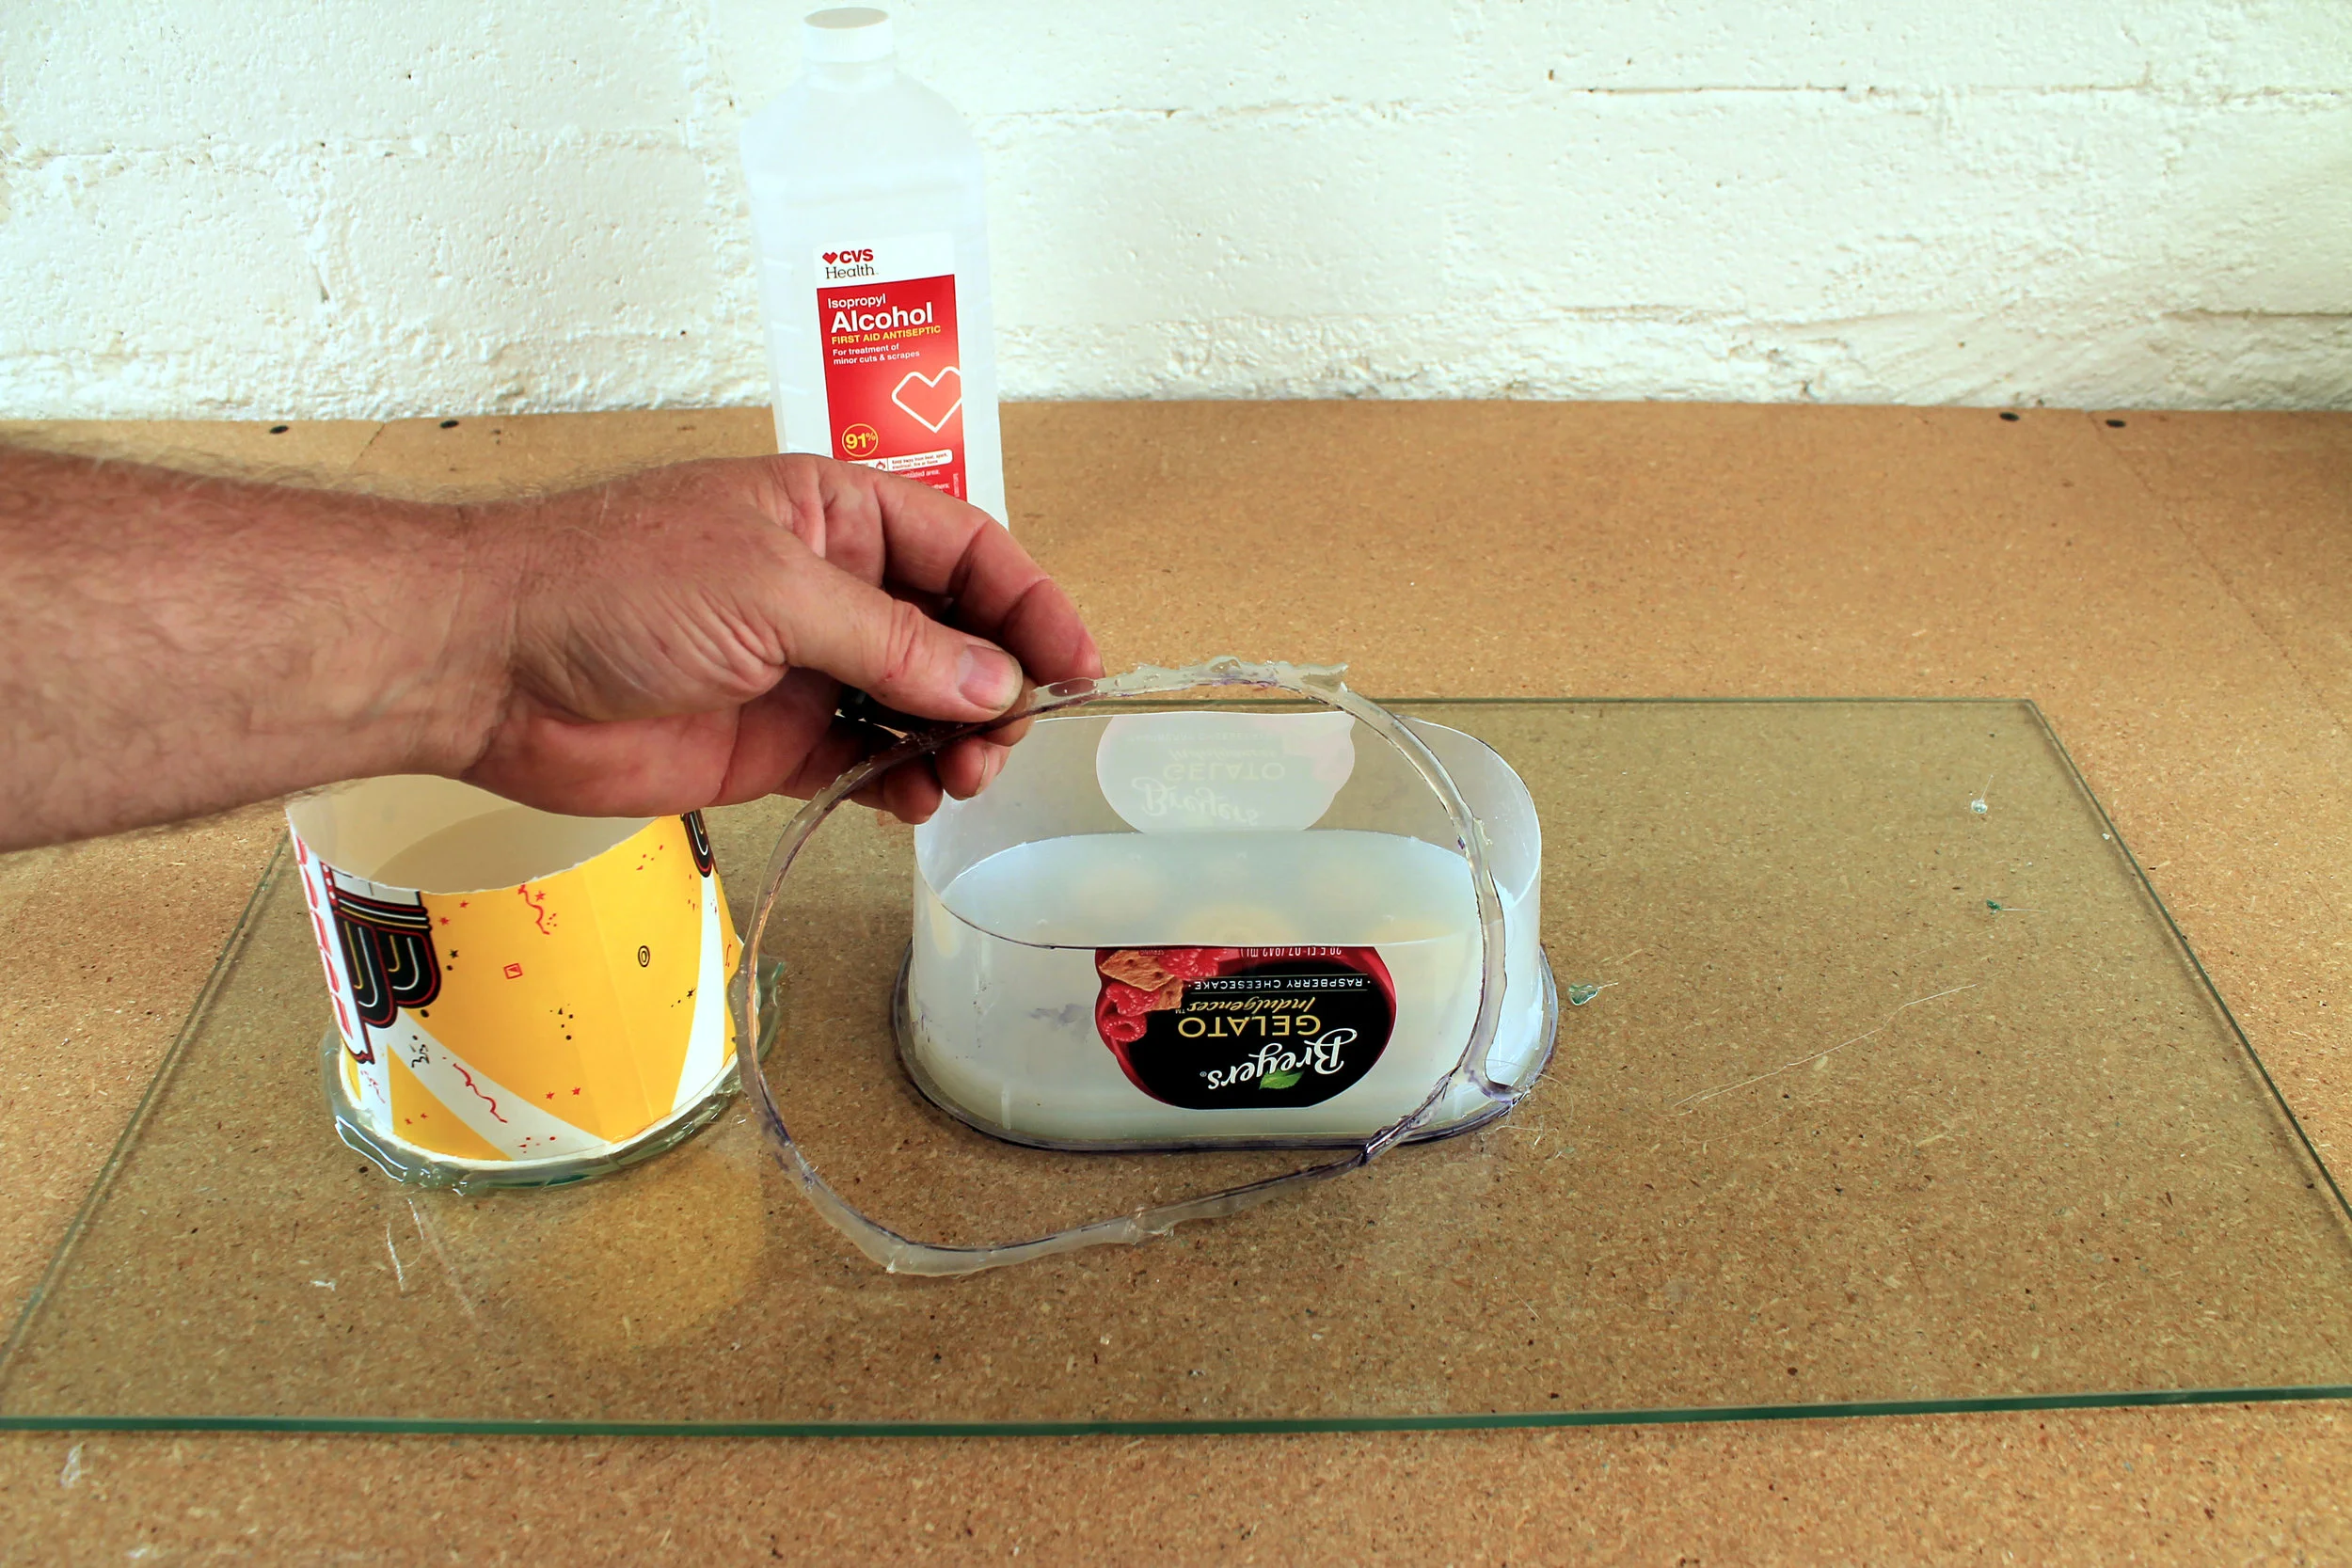
Step 9: Mold the Base Too
In addition to the discs, I am also going to make a mold of the base of the tentacle, if only to use up the rest of the silicone I have on hand. As I mentioned earlier the stuff has a limited shelf life and this particular batch has been sitting around for awhile. The process for molding the base is exactly the same as with the discs: secure it to the glass with a small dab of hot glue, create a wall around the base disc with some sort of container, hot glue that wall down to the glass, give it a spray with mold release, and pour in some silicone.

Knocking Out a Mold For the Base While I'm At It

The Pour

No Leaks. Sweet...
Step 10: Let the Silicone Cure
Let the silicone set up overnight. The instructions that came with this silicone kit stated that the mold will be set up in 4 hours but it will be even stronger if allowed to cure overnight.
Demolding the Patterns
Step 11: Remove the Plastic Container
Once the silicone is fully cured it is time to remove the disc patterns from the mold. The first thing to do is to remove the hot glue securing the edges of the plastic container to the glass. This is easily accomplished by soaking the area where the hot glue adheres to the glass with isopropyl alcohol. The alcohol will break the bond of the hot glue and make it easy to peel off. Then carefully remove the plastic container from the silicone mold leaving the silicone and the disc patterns still on the glass.

Ready...

Set...

Go!
For the Longest Time I Had No Idea Alcohol Makes Hot Glue Easy to Remove...

The Plastic Container Just Peals Off...

That's Stuck On There Real Good. Alcohol Baby! Alcohol!
Step 12: Separate the Discs From the Glass
The discs will still be stuck to the glass with hot glue and the silicone mold will have thoroughly encapsulated the disks so removing the discs from the mold must be done with care. You don't want to damage the mold. So go ahead and use the alcohol trick to help break the bond of the hot glue between the discs and the glass. Carefully use the tip of a sturdy knife to pry the discs up off of the glass. The alcohol will help immensely.

Get In There and Soak Everything With Isopropyl Alcohol
Once the Alcohol Does It's Thing, the Discs Should Pop Off of the Glass Easily

...And There It Is
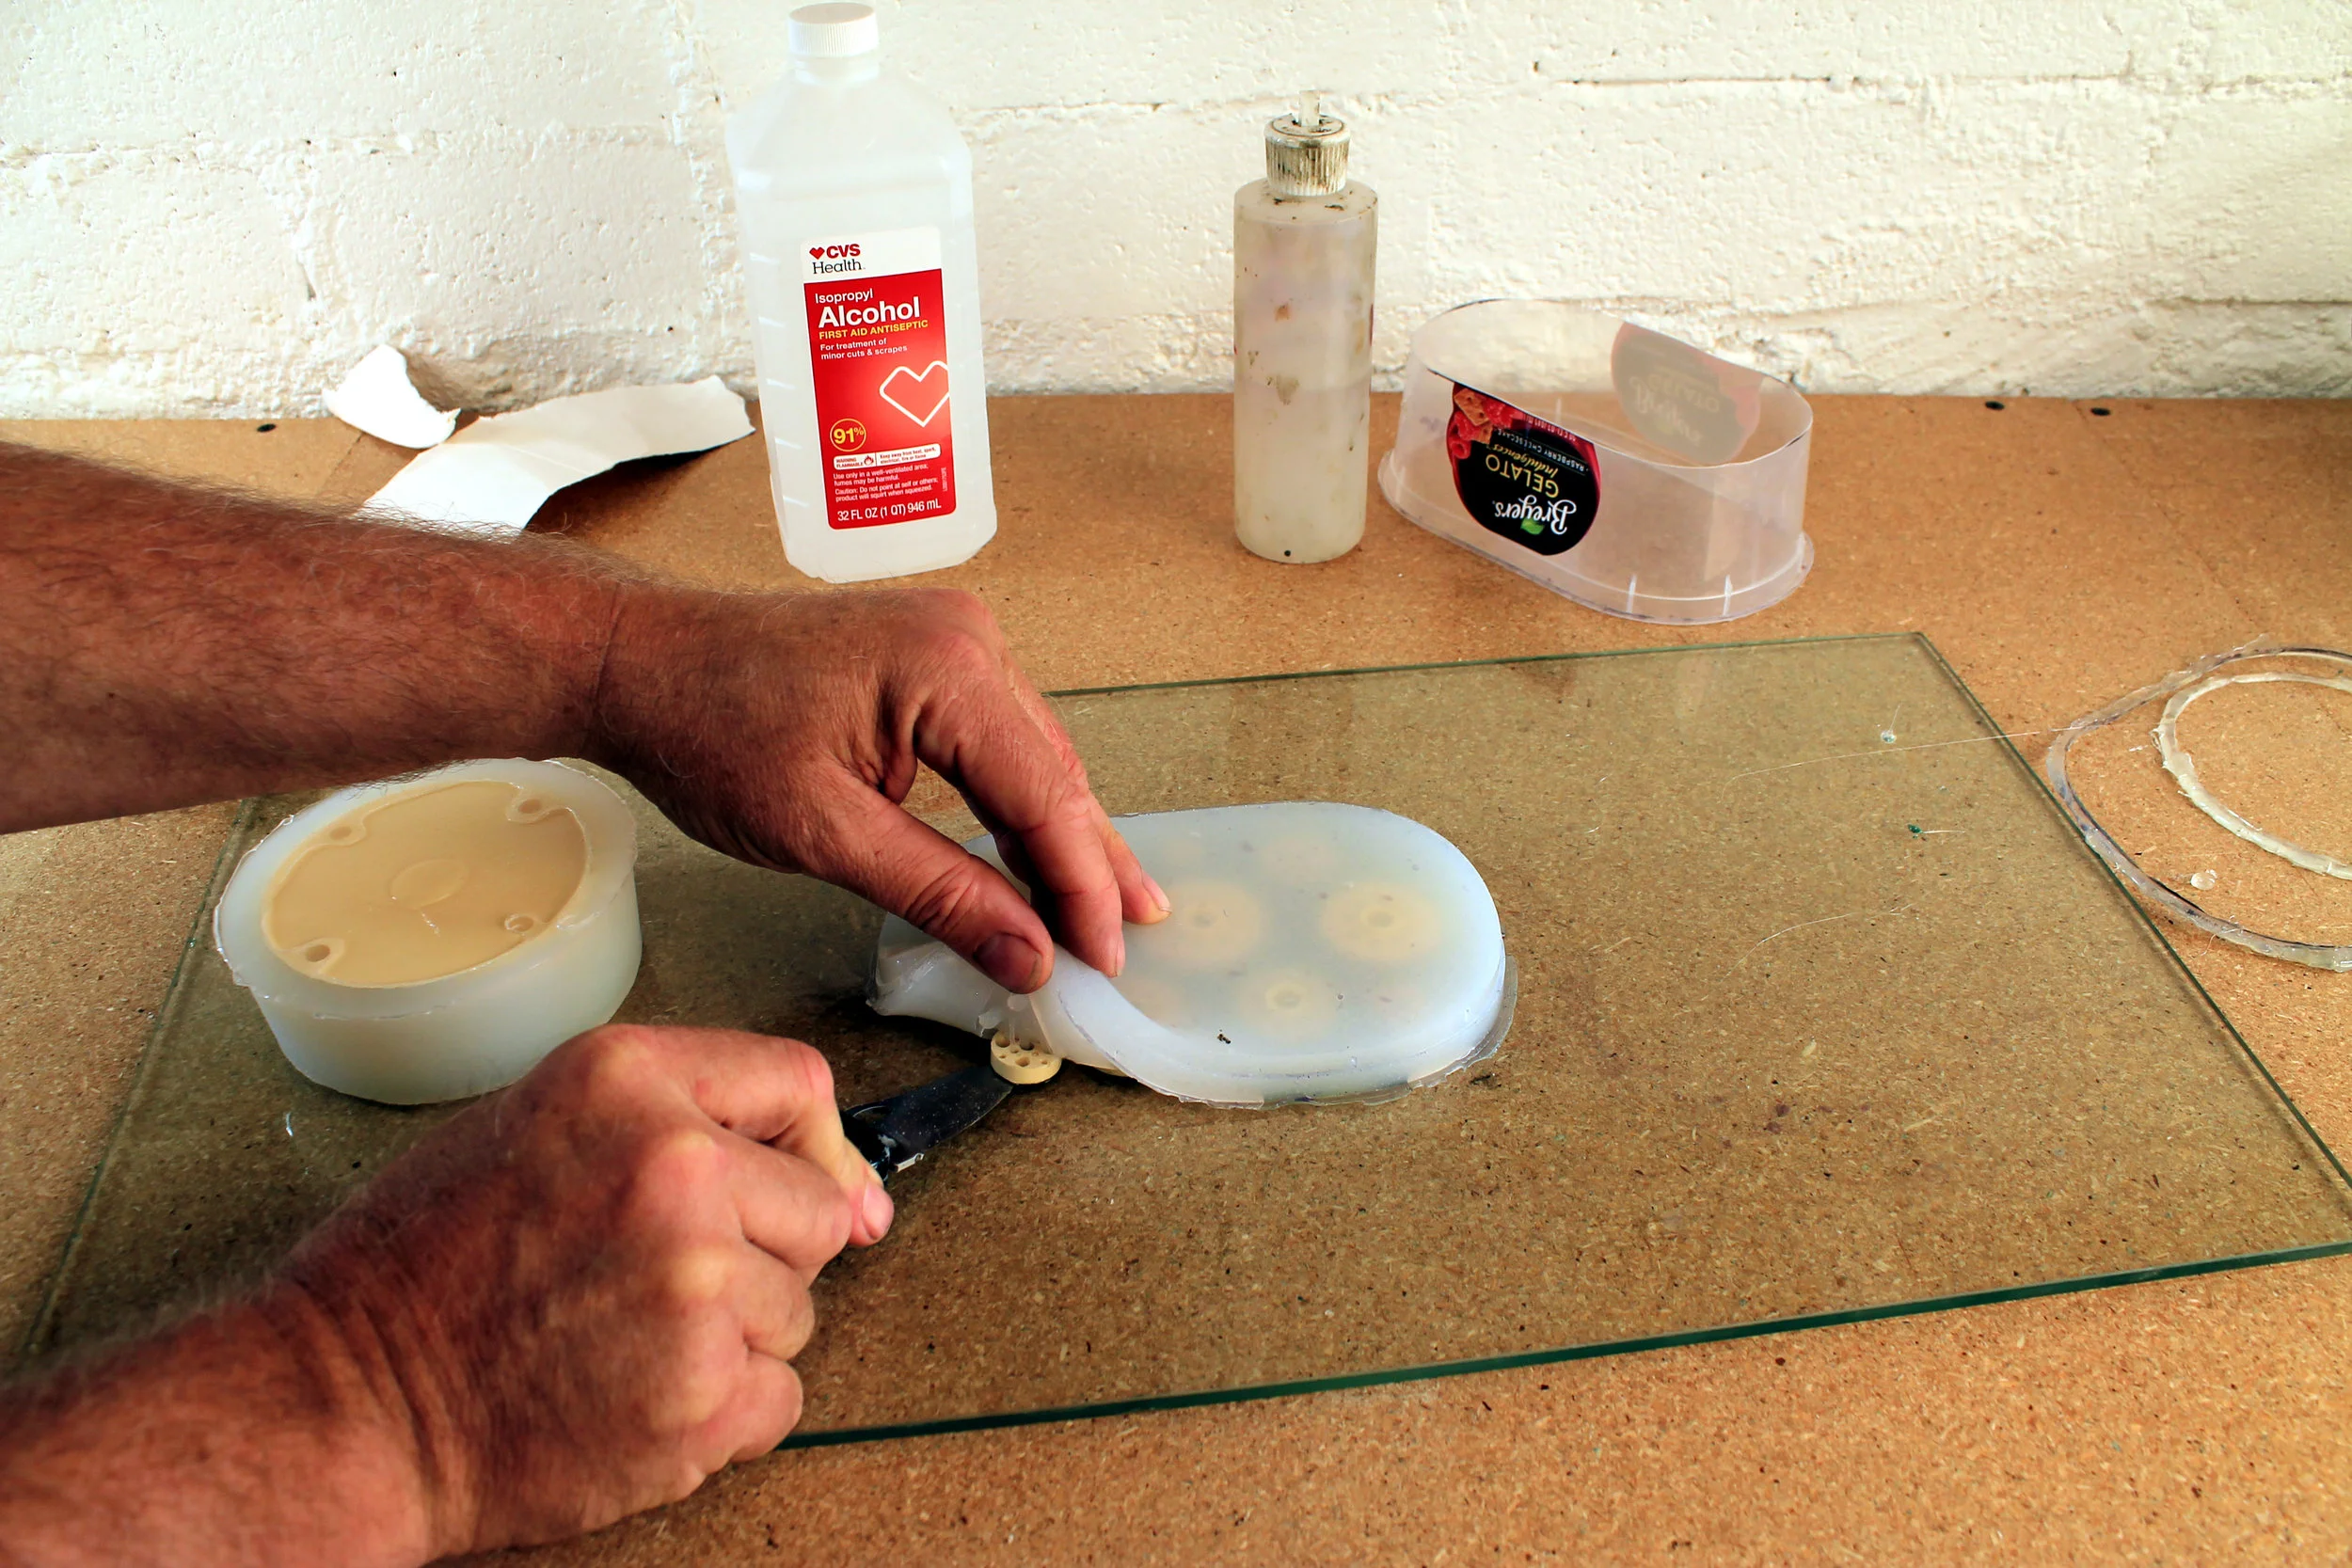
Step 13: “Surgically” Remove the Disc Patterns From the Silicone Mold
Once the mold has been separated from the glass, the silicone will require some careful trimming so that the disc patterns can be demolded with as little damage to the mold as possible. I used a sharp X-acto knife and a razor blade to surgically remove the disks. I then trimmed the edges of the mold with a small pair of cuticle scissors. Some imperfections in the mold are very likely to be present but they're not a big deal. We'll just have to clean up the discs after they have been cast.


And, Yes, I Did Cut Myself Doing This...

Trimming the Edges With cuticle Scissors

This is a Bit Too Much Stress On the Silicone, So These Protuberances Will Be Trimmed

Demolding Complete
Time To Reflect, or Did I Screw This Up?
Once I had gone through the mold making process with this particular silicone I really started to wonder if I had made a mistake. Like I mentioned earlier, this silicone is not necessarily meant for making molds. It is specifically meant for casting skins for animatronic creatures or masks. Sure enough, the packaging of the silicone kit describes the mold making process but this really is not the best silicone for making molds. However, it looks like it will work. Comparing it to some older molds I made with actual mold making silicone it is apparent these molds are significantly softer but they will serve for demonstration purposes.


I Question the Appropriateness of This Packaging for This Silicone...

It'll Be O.K.
Casting Urethane Parts
Step 14: Determine the Volume of the Molds
The molds are ready for use. We now need to determine the amount of urethane casting resin needed to fill the molds. My favorite technique for determining the volume of casting material needed is to fill the mold with water and then measure the volume of the water in a measuring cup.

Pouring the Water In

Pouring the Water Out

Measuring the Water
Step 15: Figure How Much Urethane to Mix
In this case, the base mold had a fluid volume capacity of 2 .75 fluid ounces. The base will require considerably more urethane resin than the discs, so once the volume requirements of the base mold is known I am just going to estimate the additional amount of resin needed to fill the discs mold. Let’s call it 1 fluid ounce.1 fluid ounce plus 2.7 fluid ounces divided in half equals about 1.9 fluid ounces. So, to fill the base mold and the discs mold, we will need 1.9 fluid ounces of part A and 1.9 fluid ounces of part B of the casting urethane resin measured out in separate cups.

The Volume of the Base Mold is 2.75 Fluid Ounces
Step 16: Prep the Mixing Cup or How to Not Gunk Up Your Measuring Cup
Urethane resin is fairly yucky stuff, and if you pour it into a measuring cup, that measuring cup is pretty much unusable for anything else, ever again. So for the sake of the longevity of your measuring cup, we are only going to be pouring the urethane into disposable paper cups. What we want is 1.9 fluid ounces of part A of the urethane in a disposable mixing cup. So, measure out 1.9 ounces of water in your measuring cup and pour that into a paper mixing cup. Then, mark the level of the liquid on the side of the cup with a felt tipped pen. Use a small flash light to shine a beam of light through the paper cup so you can see the level of the water in the cup, and then make the mark with a felt tip pen.Then, pour the water out of the mixing cup. Be sure to get all of the water out of the cup before using it to mix urethane because moisture in the curing urethane causes lots of funky little bubbles and voids in the finished cast part. At this point, we have a mixing cup marked at the level it will be filled with part A of the casting urethane resin.


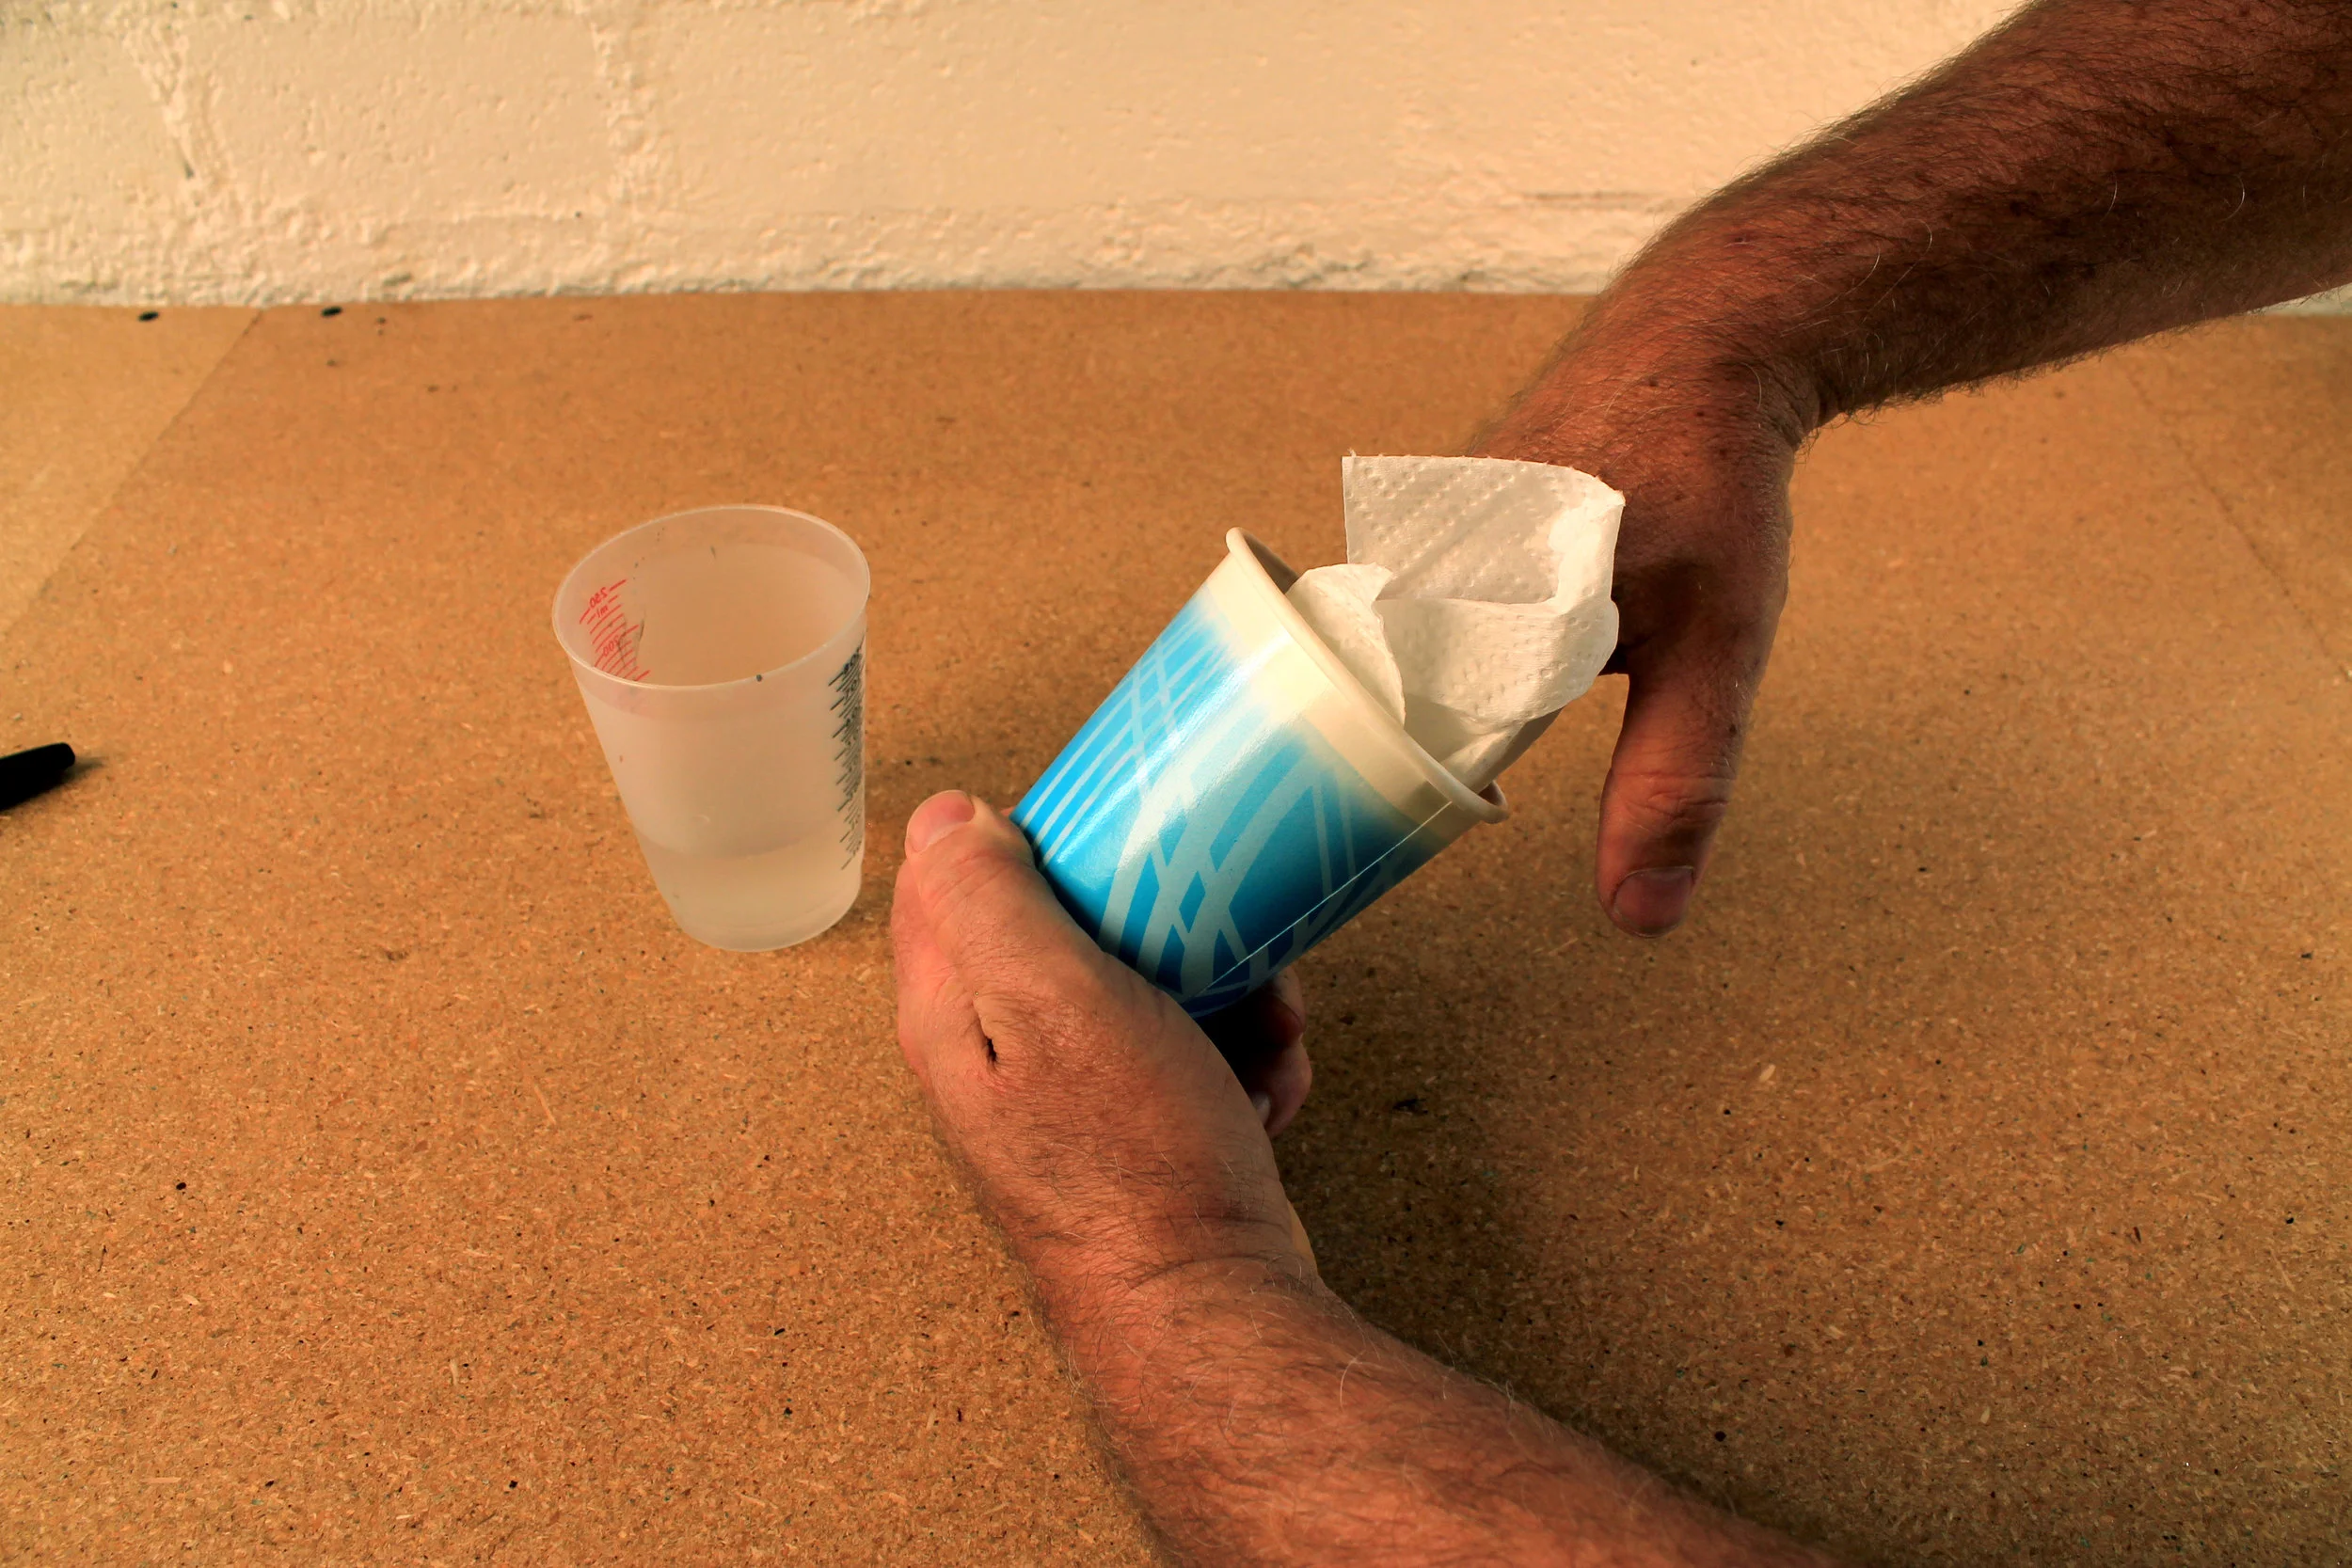
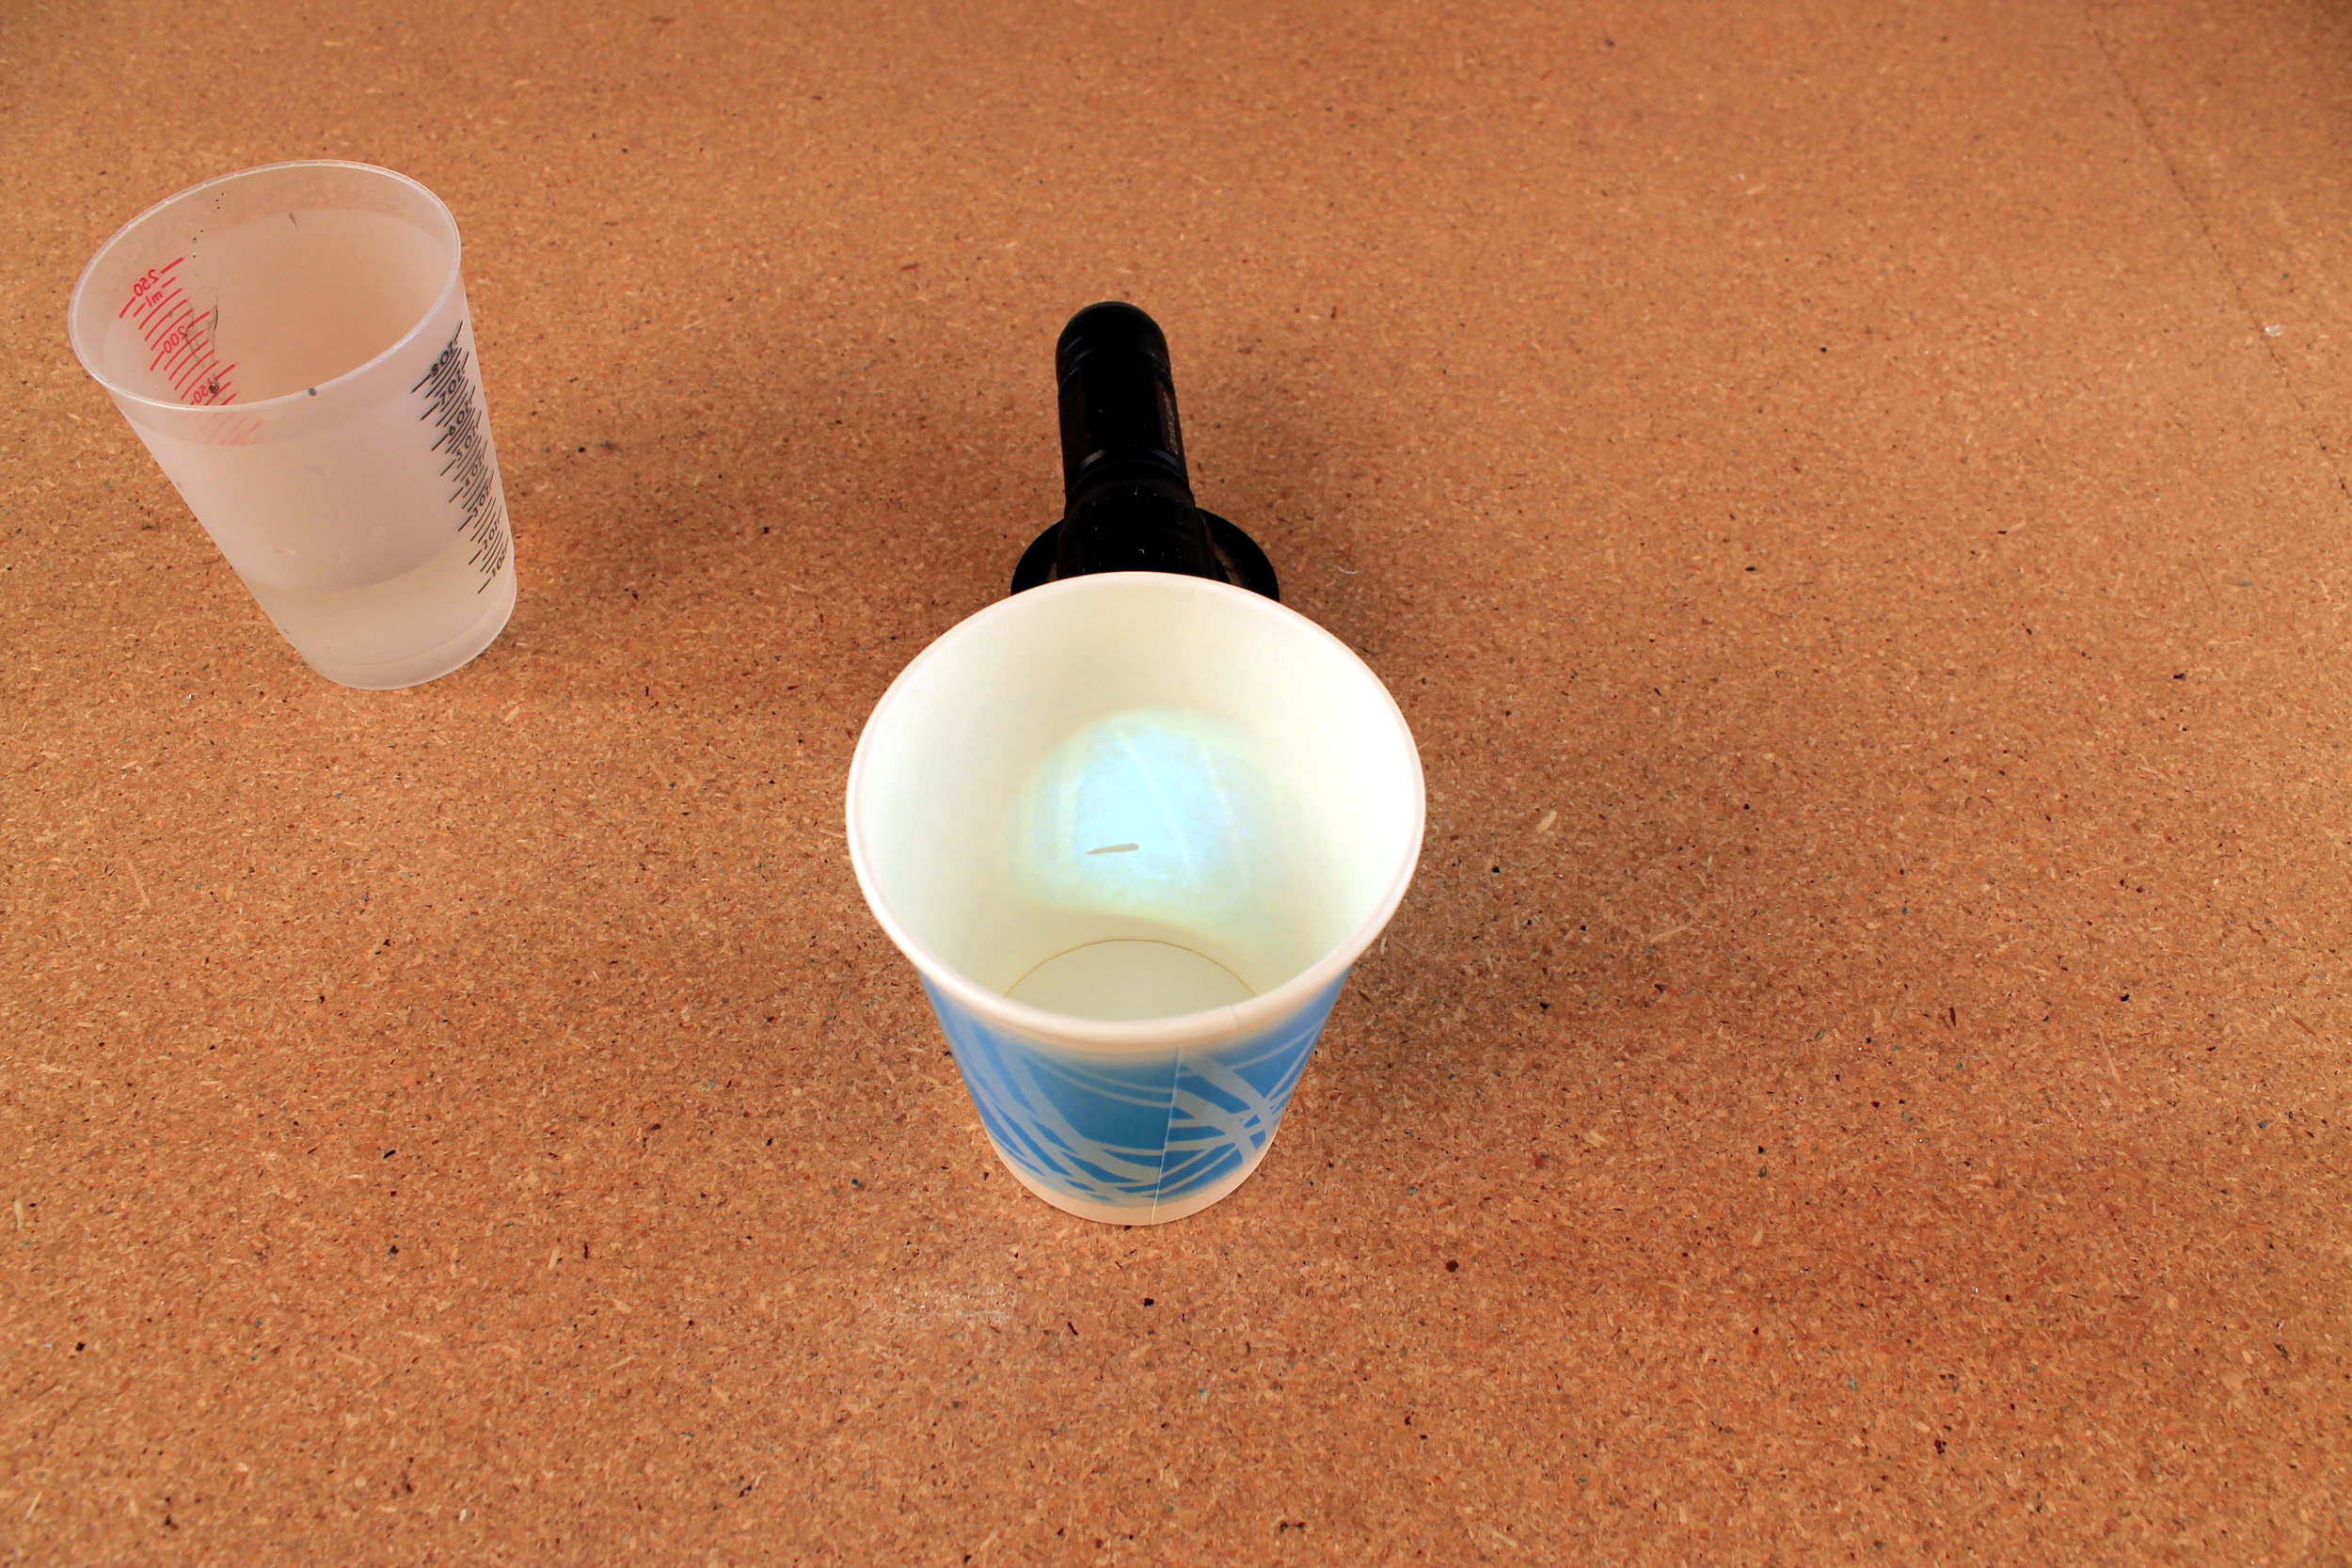
If Anybody Asks, I Invented the "Shining a Flash Light Through a Paper Cup" Technique
Step 17: Measure Out Equal Amounts of Parts A & B by Weight
Now, fill the mixing cup with part A to the level indicated by the mark. Then, weigh the cup of part A on the scale. Then, fill another cup with part B that weighs the same as part A. We now have two equal parts of the casting urethane resin ready to be mixed and poured into the mold. The part A and part B constituents of the casting resin need to be measured out in equal proportions according to their weight, not their volume. For this reason I don’t recommend just eyeballing the amounts, unless you have some experience using urethane. In the past, I have often just eyeballed the part A and part B amounts allowing for a greater amount of the lighter part B and not had any problems, but for the sake of this demonstration I am going to go ahead and measure the part A and part B with a scale. In the side-by-side comparison photo you can see that the clear part A is of a larger volume than the amber colored part B.


Step 18: Prep the Molds
Once the A and B parts of the urethane resin are measured out it is time to prep the molds for casting. Arrange them on the glass in case there is some spillage. The glass is easier to clean than a benchtop. Then, give the molds a spritz with the mold release.


Step 19: Mix, Pour, Repeat…
In a mixing cup, combine the part A and part B of the urethane resin and stir vigorously. Be sure to work somewhat quickly because the urethane will catalyze within just a few minutes. Once it is mixed, pour the urethane into the molds. You have only a minute or three before the urethane sets up so don’t lollygag.
Once the urethane begins to set up it will get hot. It will be completely cured once it has cooled down to room temperature. That should take no more than 10-15 minutes. Then you can remove the castings from the silicone.
Now repeat the process until there are enough parts to make a tentacle mechanism. We need three of each size of the discs, and we need a total of NINE of the base components, because, in addition to the tentacle we are going to make cable controllers.


The Next Step….Bodyshopping
Now, after all that, we get to cleanup and “bodyshop” all the cast parts. Yay! And yes, bodyshop is a verb.